Sanding and Finishing
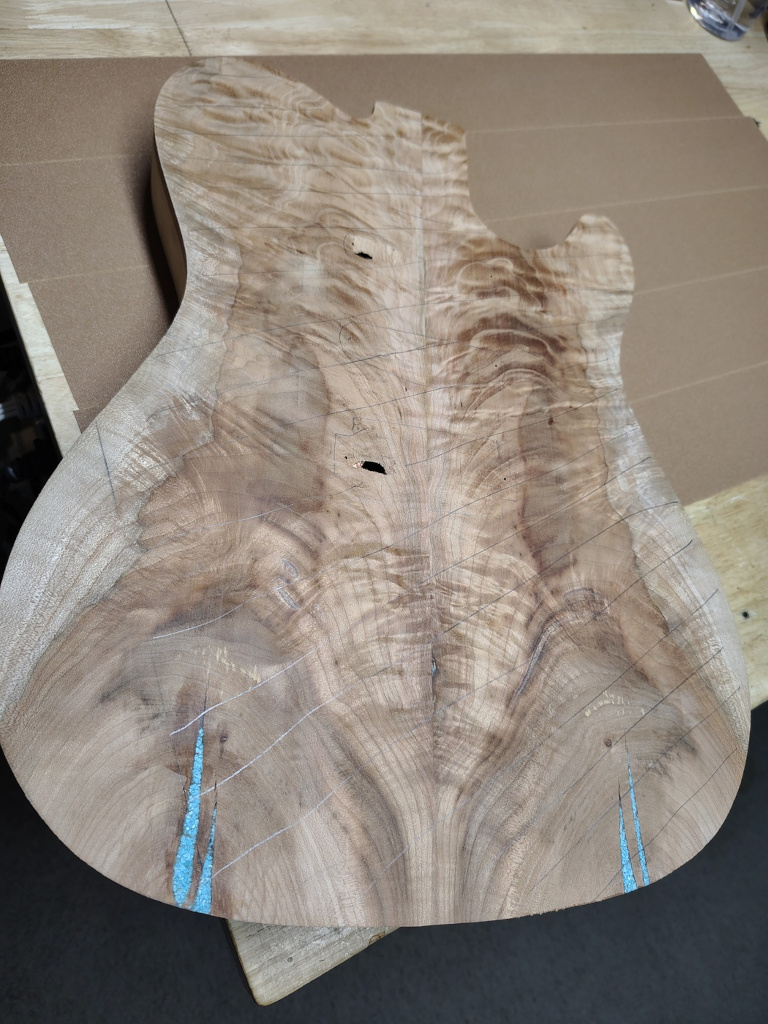
So, after many years of making guitars I've finally begun to get a handle on how to finish a guitar by hand and come out with a mirror finish. The most important part is sanding. I start with 120 grit to get the final shape. One important point to note is that, although I like the cushioned sanding pads for curved surfaces, you can't use them for flat surfaces. The cushion will allow the sanding surface to glide over the lumps and bumps. You need a flat, fairly hard surface to attach your sanding paper to. If you look at the above picture, I've used the absolutely flat surface of my workbench to attach some Gold peel-and-stick 120 grit sandpaper. This is useful if you don't have a planer or if you screw up and pop a couple of holes in the 3mm top with your planer (not naming any names here, just saying). If that happens you can spend a few pleasant hours rubbing the body over the sandpaper (with the grain). The pencil lines will let you know when it's flat. Once you get the surface flat with 120 you need to move on to 220 or 240 and then 320 (you can use a sanding block for these since the surface should be completely flat). Once you're done with the 320 you need to dampen the wood surface and let it dry. This will raise the grain. Once it's dry just sand it again with 320 to get rid of the fuzz.
Now, on to the secret sauce. I've used oil and wax, oil based poly, water based poly, and Tru Oil with varying degrees of success. I finally stumbled on to a finish that can end up looking like a professional lacquer finish without having to have a climate controlled spray booth, a professional respirator, and really good health insurance. That finish is CA glue. What!? Yep, super glue. I started out using GluBoost CA glue. Medium and thin. Their recommendation is two coats of medium followed by three coats of thin. My recommendation is three coats of medium and three coats of thin. Also, the price of GluBoost has gone up so I tried using Starbond medium and thin and they work just as well as GluBoost at a bit better price point. There is one major advantage to super glue over lacquer - lacquer can take anywhere from 14 to 21 days to cure, CA glue takes about 2 minutes for thin and 5 minutes for medium. And when I say cures in 2 minutes I mean rock hard and ready to sand in 2 minutes. I can completely finish a guitar neck in about three hours. That's from first coat to sanded and polished. You can use CA glue over water-based stains as well as raw wood and it brings out the chatoyance just as well as Tru Oil without any yellowing or darkening of the finish. One other little thing that I've noticed about CA finished necks, they don't get as sticky as lacquer when it humid (and down here in South Mississippi it gets REAL humid).
How do I apply it? First, after sanding the project (neck or body) to 320 and getting rid of the fuzz you can just slap on the first coat of medium. But, what do I use to apply it? Uh, the quicker picker upper. That's right, paper towels. Now, I use Brawny because the sheets are perforated in two directions. I can tear a single sheet into two sheets about 5 inches square. I then fold one of those sheets in half, then in half again in the same direction, then in half in the other direction. That gives you a little rectangle of about 1 and 1/4" by 2 and 1/2". You can use one side until it hardens, then use the other side, then pull it apart and fold it the other way to get two more sides to work with. A couple of major pointers here. First, get some polyethylene food service gloves. They're cheap and they don't stick to CA glue. Second, when applying the CA glue, DON'T STOP MOVING! If you do you'll glue the paper towel to the surface. That's not an insurmountable problem. Just get a single edged razor blade and use it as a scraper to get the paper towel off of the finish. I used to use nitrile gloves until I discovered the polyethylene ones. It's major fun trying to scrape the remnants of your nitrile glove off of the finish.
Here are a few more pointers. You need to apply the super glue in a place that is not too humid. Water vapor is what hardens CA glue. I do all my finishing in the house so the humidity is below 50%. When applying glue to a curved surface put the glue on the paper towel and then wipe it on the surface. On a large flat surface, like the top of a guitar you can put some glue on the surface and then wipe it around (as long as you're careful about it). Putting the glue on the paper towel first uses up more glue but you won't get any runs or drips. Trust me, CA glue runs are a bit harder to get rid of than paint runs. You have to use your trusty single edged razor blade. When applying glue to tight places, like the cutaways of a guitar, use Q-Tips. They work great because the cotton keeps the glue from hardening as fast since it can't be contacted by water vapor in the air. And now, safety fourth as they say - get a P100 respirator (not very expensive) and a pair of goggles. You don't want to be breathing the fumes and you definitely don't want them getting in your eyes. Man that stuff burns!
After each coat of medium I usually run a razor blade (as a scraper) over the flat surfaces to get rid of any nibs sticking up. You always get a few from dust. When you get through the three coats of medium you can sand the surface fairly flat with 240 grit sandpaper. Again, use a solid block for flat surfaces and the cushioned pads for curved surfaces. Be careful not to sand through on any edges. After that is done you can apply the three coats of thin CA glue. The thin CA is where you run the most risk of gluing yourself or your paper towel applicator to the surface. Move quickly young padawan. When the last coat is dry it's time to start the serious sanding.
Start with 240 grit and sand the surfaces to remove any shiny spots. Remember, hard flat sanding block for the flat areas. Follow up with 320. Now we get to the (possibly) expensive part. I use Eagle Abrasives Super Assilex (K600-K1500) and Super Buflex (K2000, K2500, K3000) to get the guitar ready to use Micro-Mesh. The Super Assilex Starter Kit costs $78 on Amazon and the Super Buflex Starter Kit cost $59 on Amazon. That may seem a bit pricey but this stuff lasts forever. In addition, you get to use it dry. I use K600, K800, K1000, K1200, K1500, K2000, K2500, and then K3000. I use the hook and loop block that comes with the starter kits to use it. You can use regular wet sanding paper to accomplish the same thing (it's just very messy and you can only use the paper once). For wet sanding you would use P360, P600, P800, P1000, P1200, P1500, P2000, and then P2500. When you get to K3000 or P2500 you'll think you've got a pretty shiny finish. Au contraire, mon frere.
Now, you need Micro-mesh sanding pads. You can get a set of 9 different pads for about $23 on Amazon. The pads go from 1500 to 12000 but you only want to use the last six if you've gone up to K3000 or P2500. That is, 3200, 3600, 4000, 6000, 8000, and 12000. These are best used wet but you can use them dry as well. The grit is so fine you won't make much of a mess using them wet. I don't know of anything that you can use in place of these except a buffing wheel (which I don't have). When you get to 12000 you'll say "I can see myself!". So, now you think you're done. No way, Jose.
There are any number of car polishes on the market and I would be willing to bet that any of them will work just as good as any other. That being said, I use Meguiar's. Specifically, Meguiar's Ultimate Compound, Meguiar's Professional M09 Swirl Remover, and Meguiar's Ultimate Polish. I apply them with pieces of shop towel folded into little rectangles (sound familiar?). Just rub it in (vigorously) and wipe it off. And, et voila!
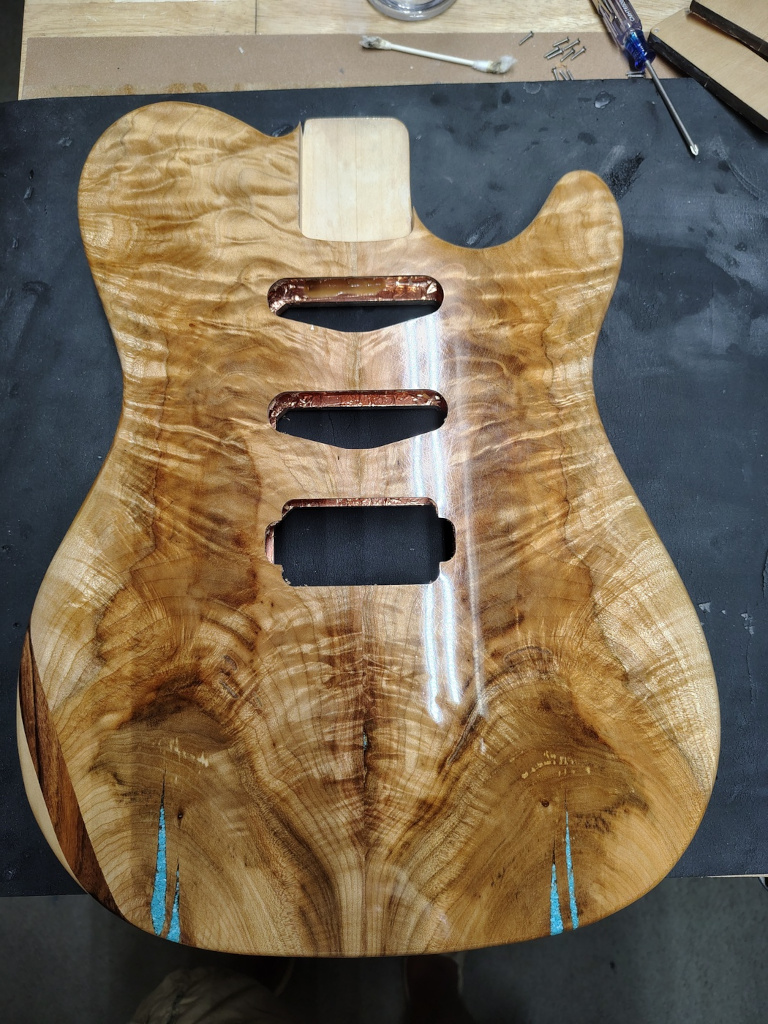
To give some examples of the different levels of smoothness, here are four pictures of the fretboard of my current build. First, the CA coatings sanded to 320 (the sheets in the upper left are the Super Assilex and Super Buflex sheets ready for use with K600 on top).
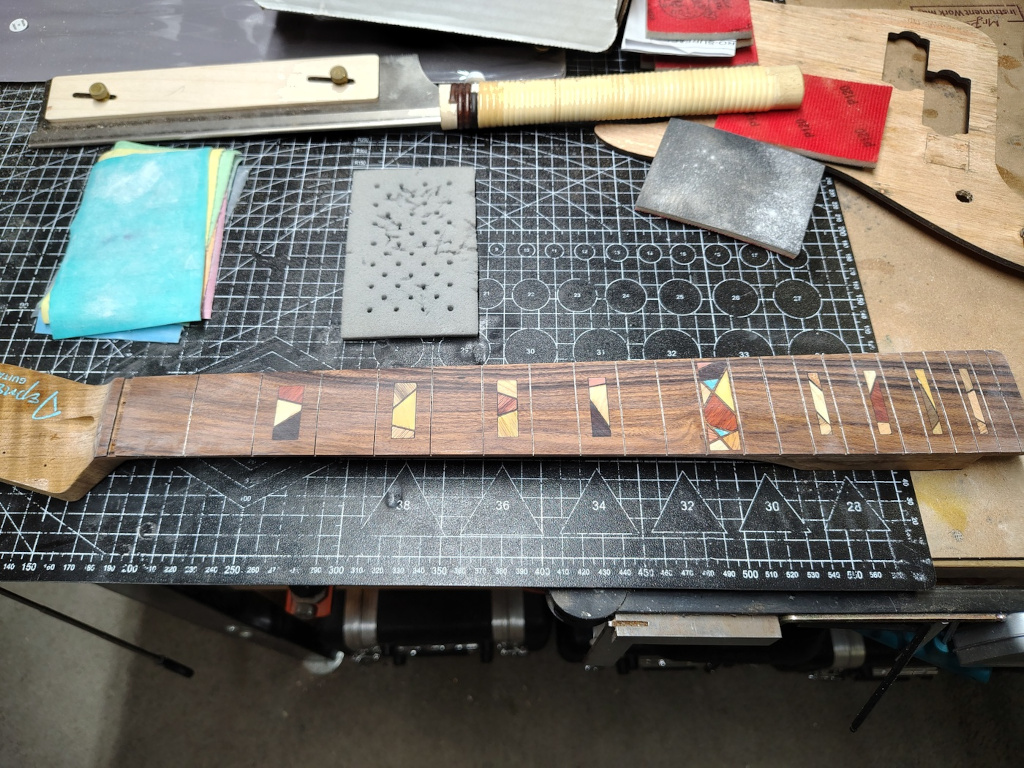
Next shows it sanded to K3000.
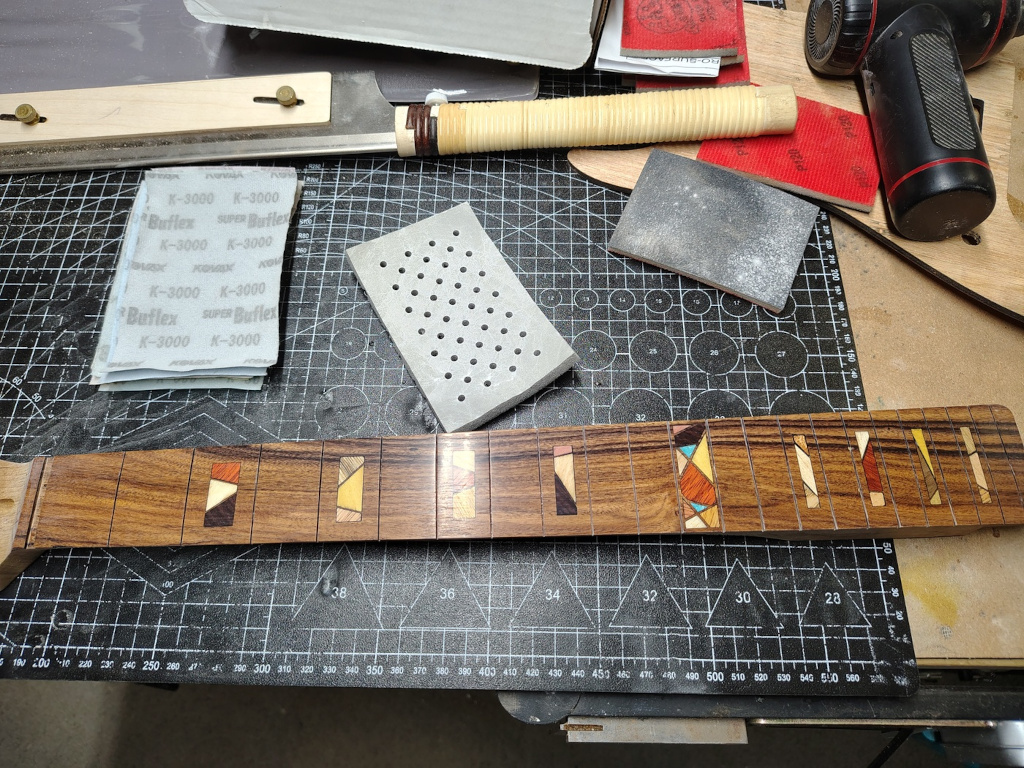
Looks pretty good. Next is sanded to micro-mesh 12000.
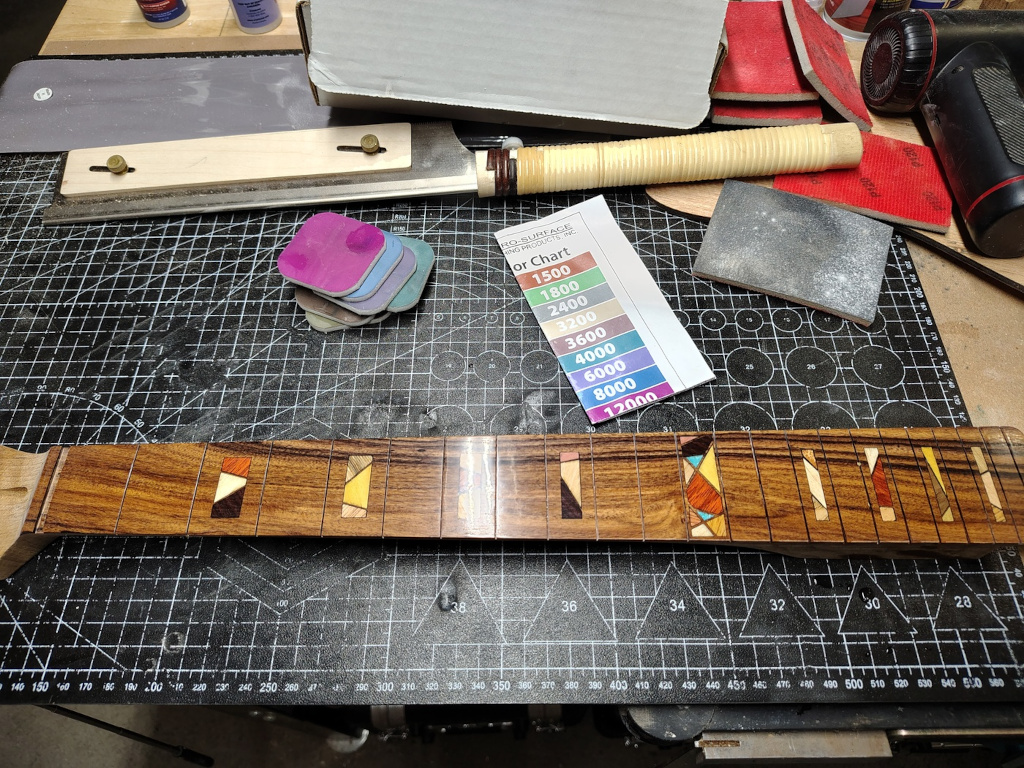
Really looking good now. But how about rubbed and polished out with Meguiar's products.
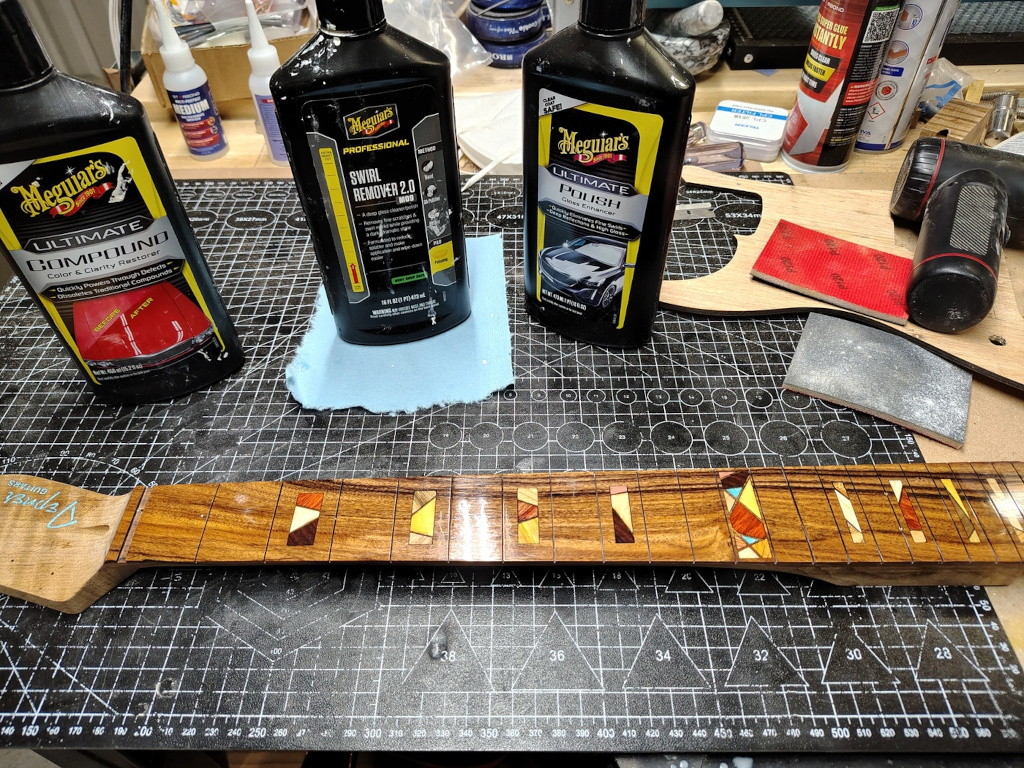
Bingo! I will probably wax it with Renaissance Wax (By Appointment To Her Majesty the Queen or His Majesty The King depending on when it was made) but the difference in sheen won't be much. Renaissance Wax is pretty good but it smells like Vicks VapoRub mixed with leaded gasoline. Anyway, as you can see, the different levels of sanding of the CA coatings make all the difference in the world.